If you’ve ever seen images of yogis sitting in deep meditation, chances are they were in Lotus Pose—one of the most iconic and revered seated postures in yoga. Known as Padmasana in Sanskrit (padma = lotus, asana = pose), this classic yoga pose is celebrated not just for its aesthetic grace but for its profound impact on both body and mind.
Whether you’re new to yoga for beginners or looking to deepen your meditation practice, mastering Lotus Pose can transform your flexibility, posture, and mental clarity. In this comprehensive guide, we’ll walk you through everything you need to know about Lotus Pose—from its incredible benefits to step-by-step instructions, safety tips, and modifications that make it accessible for everyone.
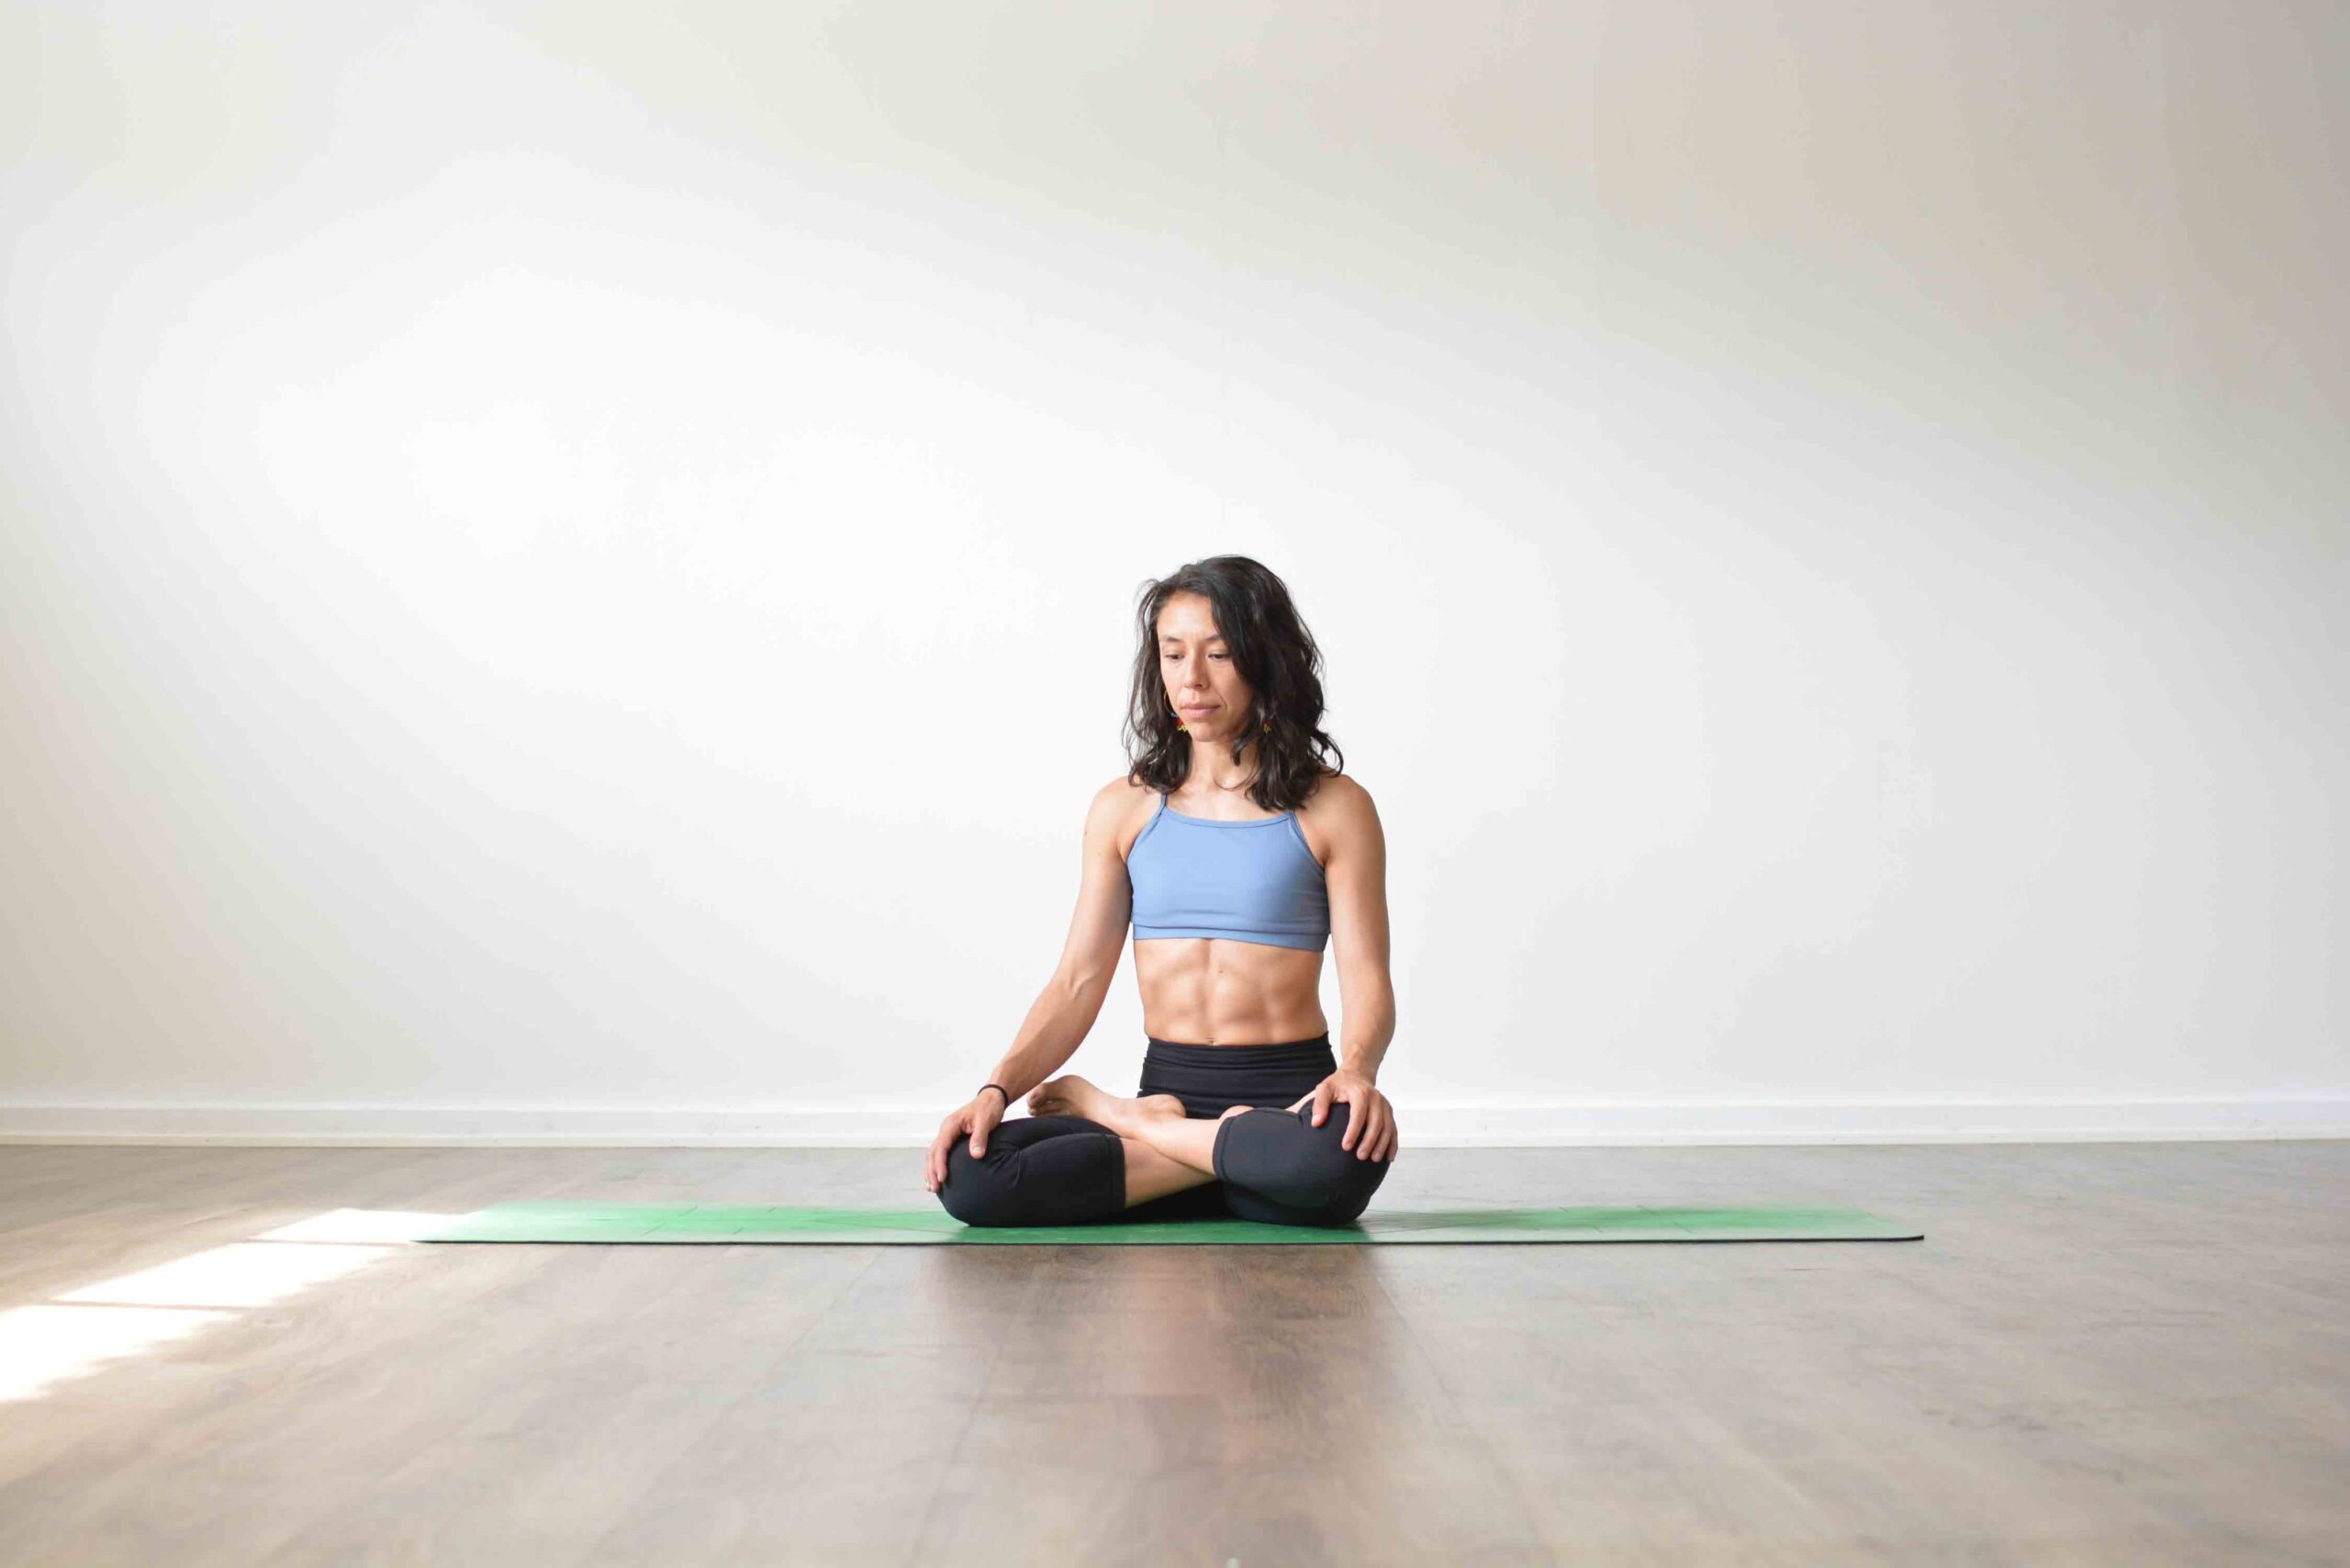
What Is Lotus Pose (Padmasana)?
Lotus Pose is a seated yoga pose where you sit cross-legged with each foot placed on the opposite thigh, soles facing upward. This symmetrical position creates a stable, grounded base perfect for meditation, breathwork (pranayama), and cultivating inner stillness.
The pose gets its name from the lotus flower, which symbolizes purity, enlightenment, and spiritual awakening in yogic philosophy. Just as the lotus rises from muddy waters to bloom beautifully, practitioners use this pose to elevate their consciousness and find peace amidst life’s challenges.
Traditional Uses
- Meditation: Lotus Pose is the traditional seated position for extended meditation sessions
- Pranayama: The stable base allows for focused breathing exercises
- Spiritual practices: Used in various yoga and Buddhist traditions for centuries
Benefits of Lotus Pose: Why You Should Practice Padmasana

Lotus Pose offers remarkable yoga benefits for flexibility, mental health, and overall wellness. Here’s what regular practice can do for you:
Physical Benefits
- Improves Hip Flexibility: Lotus Pose deeply stretches the hip flexors, external rotators, and inner thighs, gradually increasing your range of motion.
- Strengthens Ankles and Knees: The pose builds strength in the ankle joints and stabilizing muscles around the knees when practiced correctly.
- Enhances Posture: By aligning the spine naturally upward, Lotus Pose trains your body to maintain proper posture throughout the day.
- Stimulates Abdominal Organs: The positioning gently massages digestive organs, potentially improving digestion and metabolism.
- Increases Circulation: The cross-legged position encourages blood flow to the pelvic region and lower back.
Mental & Emotional Benefits
- Reduces Stress and Anxiety: Like many poses in our Yoga for Anxiety and Emotional Balance guide, Lotus Pose activates the parasympathetic nervous system, promoting relaxation.
- Improves Focus and Concentration: The grounded, stable position helps quiet mental chatter and sharpen your awareness.
- Deepens Meditation Practice: The pose creates the ideal foundation for longer meditation sessions by minimizing physical distractions.
- Cultivates Mindfulness: Holding the pose requires present-moment awareness, training your mind to stay centered.
Energetic Benefits
According to yogic tradition, Lotus Pose:
- Balances the root chakra (Muladhara) and sacral chakra (Svadhisthana)
- Helps contain and redirect energy upward through the spine
- Creates a sense of being grounded yet elevated
Research published in the International Journal of Yoga shows that regular practice of seated meditation postures like Lotus Pose can significantly reduce cortisol levels and improve emotional regulation.
How to Do Lotus Pose: Step-by-Step Instructions
Lotus Pose requires patience and consistent practice. Follow these detailed steps to work toward the full expression safely:
Starting Position
- Sit on your mat with legs extended straight in front of you (Staff Pose/Dandasana)
- Warm up your hips with gentle stretches—try some Simple Morning Stretches for Beginners to prepare your body
- Sit on a cushion or folded blanket if your hips are tight—elevation makes the pose more accessible
Entering Lotus Pose
Step 1: Bend your right knee and bring your right ankle toward your left hip crease. Use your hands to guide your foot.
Step 2: Gently place your right foot on top of your left thigh, as close to your hip crease as comfortable. The sole should face upward toward the ceiling.
Step 3: Bend your left knee and carefully lift your left foot with your hands.
Step 4: Place your left foot on top of your right thigh, bringing it close to your right hip crease. Again, the sole faces upward.
Step 5: Adjust both feet so they’re evenly positioned, with your knees resting comfortably on the floor (or as close as possible).
Step 6: Lengthen your spine upward, drawing the crown of your head toward the ceiling.
Step 7: Rest your hands on your knees in Gyan Mudra (thumb and index finger touching) or in your lap, palms facing up.
Step 8: Close your eyes or soften your gaze, and breathe deeply for 1-5 minutes (or longer if comfortable).
Exiting the Pose
- Gently release your left leg first, then your right
- Extend both legs forward and shake them out
- Important: Always alternate which leg goes on top in future sessions to maintain balance
Lotus Pose Modifications for Beginners
Don’t worry if full Lotus Pose feels impossible right now—it requires significant hip flexibility that develops over time. Try these beginner-friendly modifications:
Half Lotus Pose (Ardha Padmasana)
- Place only one foot on the opposite thigh
- Keep the other foot tucked under the opposite thigh on the floor
- This is an excellent stepping stone toward the full pose
Easy Pose (Sukhasana)
- Simply sit cross-legged with shins crossed
- No feet on thighs required
- Perfect for those just starting their yoga flexibility routine
Quarter Lotus
- One foot rests on the opposite calf rather than the thigh
- Provides some hip opening with less intensity
Props to Use
| Prop | How It Helps |
|---|---|
| Yoga blocks | Place under knees for support if they don’t reach the floor |
| Cushion/bolster | Elevate hips to reduce strain on knees and ankles |
| Blanket | Fold and sit on edge to tilt pelvis forward |
| Wall support | Sit with back against wall to maintain spinal alignment |
Much like the progressive approach in our Plow Pose Guide, taking your time with modifications prevents injury and builds sustainable flexibility.
Safety Tips & Precautions
While Lotus Pose offers tremendous benefits, it’s crucial to practice safely to avoid injury:
⚠️ Who Should Avoid Lotus Pose
- Knee injuries: Skip this pose if you have knee pain, meniscus tears, or ligament damage
- Ankle injuries: Recent sprains or chronic ankle issues make this pose risky
- Sciatica: The position can aggravate sciatic nerve pain in some individuals
- Pregnancy: After the first trimester, this pose may become uncomfortable
✅ Safety Guidelines
- Never force the pose: Pain is a signal to back off—flexibility develops gradually
- Warm up thoroughly: Spend 10-15 minutes on hip-opening stretches before attempting Lotus
- Use props generously: There’s no shame in using blocks, cushions, or blankets
- Listen to your body: Mild stretching sensation is okay; sharp pain is not
- Protect your knees: The movement should come from hip rotation, not knee torque
- Practice regularly but briefly: Short, consistent sessions are better than long, infrequent ones
- Alternate legs: Always switch which leg is on top to prevent imbalances
According to the Yoga Journal, many knee injuries in yoga occur from forcing poses like Lotus before the body is ready. Patience is essential.
Preparatory Poses: Build Your Foundation
Before attempting Lotus Pose, incorporate these how to do basic yoga poses into your practice:
Hip Openers
- Bound Angle Pose (Baddha Konasana): Sit with soles of feet together, knees falling outward
- Pigeon Pose: Deep hip flexor and external rotator stretch
- Fire Log Pose (Agnistambhasana): Stacks shins on top of each other
Hamstring Stretches
- Seated Forward Fold: Lengthens hamstrings and lower back
- Wide-Legged Forward Fold: Opens inner thighs and hips
Ankle Strengtheners
- Toe Pose (Vajrasana variation): Strengthens ankles and improves flexibility
- Ankle circles: Simple warm-up movement
Consider starting your day with a morning yoga stretches routine that includes these preparatory poses. Our guide on Yoga for Stress Relief offers additional poses that complement Lotus Pose practice.
Tips for Mastering Lotus Pose
1. Consistency Over Intensity
Practice for 5 minutes daily rather than forcing 30 minutes once a week. Gradual adaptation prevents injury and builds lasting flexibility.
2. Focus on Hip Rotation
The key to Lotus Pose is external hip rotation, not knee flexibility. If the movement feels like it’s happening in your knees, you’re forcing it—back off and work on hip openers instead.
3. Breathe Through Discomfort
Use deep, slow breaths to help your muscles relax into the stretch. Tension and holding your breath make the pose harder.
4. Strengthen and Stretch
Combine flexibility work with strength training. Strong hip muscles support the joint better and allow for safer, deeper stretching.
5. Consider Your Body Type
Some people have anatomical variations (like hip socket shape) that make Lotus Pose more challenging or even inadvisable. Respect your unique body structure.
6. Use Meditation Time Wisely
Even if you can only hold Half Lotus, use the position for meditation. The mental benefits accumulate regardless of whether you’re in full or modified expression.
7. Work with a Teacher
If possible, have a qualified yoga instructor observe your alignment. Small adjustments can make a huge difference in comfort and safety.
Complementary Practices
Enhance your Lotus Pose practice with these additional elements:
Breathwork (Pranayama)
Once settled in Lotus, try:
- Alternate Nostril Breathing (Nadi Shodhana): Balances energy channels
- Ocean Breath (Ujjayi): Calms the nervous system
- Three-Part Breath (Dirga Pranayama): Deepens lung capacity
Meditation Techniques
- Mindfulness meditation: Focus on breath and bodily sensations
- Mantra repetition: Use a traditional mantra like “Om”
- Visualization: Imagine yourself as a lotus flower, rooted yet blooming
Combine with Other Practices
Lotus Pose works beautifully in sequences featuring:
- Morning yoga benefits: Set intentions for your day while seated
- Evening wind-down routines: Release tension before bed
- Chakra balancing practices: Focus on energy center alignment
Common Mistakes to Avoid
| Mistake | Why It’s Problematic | The Fix |
|---|---|---|
| Forcing feet onto thighs | Can tear knee ligaments or meniscus | Use Half Lotus until flexibility improves |
| Slouching spine | Defeats the postural benefits and compresses organs | Sit on a cushion and actively lengthen spine |
| Holding breath | Creates tension and prevents relaxation | Maintain steady, rhythmic breathing |
| Skipping warm-up | Increases injury risk dramatically | Always do 10-15 minutes of hip openers first |
| Same leg always on top | Creates muscular imbalances | Alternate which leg is on top each session |
| Practicing on hard surface | Adds unnecessary pressure on ankles and knees | Use a yoga mat or padded surface |
Frequently Asked Questions About Lotus Pose
How long does it take to master Lotus Pose?
For most people, it takes 6 months to 2 years of consistent practice to comfortably sit in full Lotus Pose. Factors include your starting flexibility, body structure, practice frequency, and age. Don’t rush—Half Lotus offers similar benefits.
Can I practice Lotus Pose if I have tight hips?
Yes, but start with modifications like Easy Pose or Half Lotus. Dedicate time to hip-opening poses, and be patient. Tight hips are common, especially for people who sit at desks all day. A dedicated yoga flexibility routine will gradually improve your range of motion.
Is Lotus Pose bad for your knees?
Lotus Pose is only problematic for knees when forced or practiced with poor alignment. The rotation should come from the hips, not the knees. If you feel knee pain, you’re pushing too hard—back off immediately and use modifications.
Should my knees touch the floor in Lotus Pose?
Ideally, yes, but many practitioners’ knees remain elevated, especially when starting out. Using a cushion to elevate your hips helps knees descend naturally over time. Never force them down.
What’s the difference between Lotus and Easy Pose?
Easy Pose (Sukhasana) is a simple cross-legged position where shins cross and feet tuck under opposite thighs. Lotus Pose (Padmasana) places each foot on top of the opposite thigh, requiring significantly more hip flexibility and external rotation.
Can Lotus Pose help with lower back pain?
When practiced correctly with proper spinal alignment, Lotus Pose can strengthen the muscles that support your lower back and improve posture. However, if you have acute back pain, consult a healthcare provider before attempting the pose.
How can I make Lotus Pose more comfortable?
- Sit on a cushion or folded blanket to elevate your hips
- Use blocks under your knees for support
- Wear comfortable, stretchy clothing
- Practice after your body is warm (post-workout or after a warm shower)
- Hold for shorter durations initially
Can beginners do Lotus Pose?
Beginners can work toward Lotus Pose, but most should start with Easy Pose or Half Lotus. According to research from the National Center for Complementary and Integrative Health, beginning with appropriate modifications reduces injury risk while still providing benefits.
The Mind-Body Connection: Beyond Physical Practice
Lotus Pose isn’t just about physical flexibility—it’s a gateway to deeper self-awareness. The ancient yogis chose this pose for meditation because:
- It creates energetic containment: The crossed legs create a circuit that contains and redirects prana (life force energy) upward
- It promotes stillness: The stable base minimizes fidgeting and physical distraction
- It symbolizes awakening: Like the lotus flower rising from mud, practitioners rise above daily concerns to find clarity
Many practitioners report that their relationship with Lotus Pose mirrors their approach to life’s challenges—requiring patience, self-compassion, acceptance of limitations, and celebration of progress.
Conclusion: Your Journey with Lotus Pose
Lotus Pose is a beautiful journey, not a destination. Whether you’re sitting in full Padmasana, Half Lotus, or Easy Pose, what matters most is showing up consistently with mindfulness and respect for your body.
Remember that flexibility is just one piece of the puzzle. The true gift of Lotus Pose lies in the mental clarity, emotional balance, and spiritual grounding it cultivates. Every moment you spend working toward this pose is an investment in your overall wellbeing.
Your Next Steps
Ready to deepen your practice? Here are some resources to continue your journey:
✨ Explore Related Guides:
- Yoga for Anxiety and Emotional Balance – Calm your mind naturally
- Simple Morning Stretches for Beginners – Start your day with movement
- Plow Pose Guide – Another transformative yoga pose
- Check out our complete library of yoga for beginners content at YogaSniff.com
Take Action Today
🧘♀️ Challenge yourself: Try sitting in Easy Pose or Half Lotus for just 5 minutes today. Notice how your body feels. Set a reminder to practice again tomorrow.
📚 Keep learning: Subscribe to YogaSniff for weekly yoga tips, pose breakdowns, and mindful wellness content delivered to your inbox.
🙏 Share your journey: Have you tried Lotus Pose? What challenges or breakthroughs have you experienced? Connect with our community and share your story!
Remember, yoga is a practice of self-discovery and self-compassion. Honor where you are today, and trust that consistent effort will bring transformation. Your Lotus is blooming—one breath, one practice at a time.
Namaste 🙏
Quick Reference: Lotus Pose Cheat Sheet
📋 Save or print this for easy reference:
Sanskrit Name: Padmasana
Difficulty Level: Intermediate to Advanced
Primary Benefits: Hip flexibility, improved posture, enhanced meditation, stress relief
Muscles Worked: Hip flexors, external rotators, inner thighs, core stabilizers
Hold Time: 1-5 minutes (or longer for meditation)
Best Time to Practice: After warming up or post-workout
Props Needed: Cushion or blanket, optional blocks
Contraindications: Knee/ankle injuries, sciatica, late pregnancy