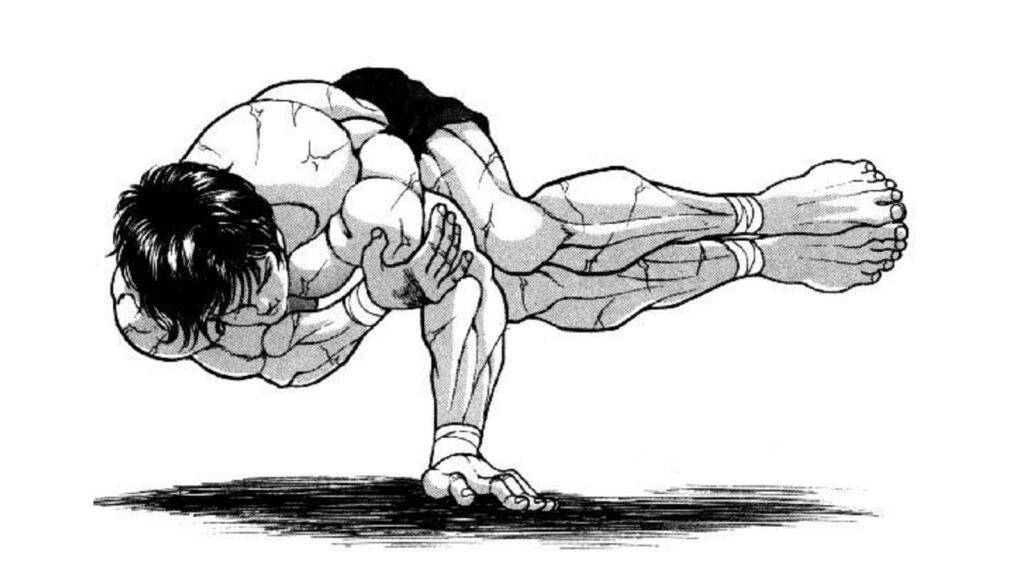
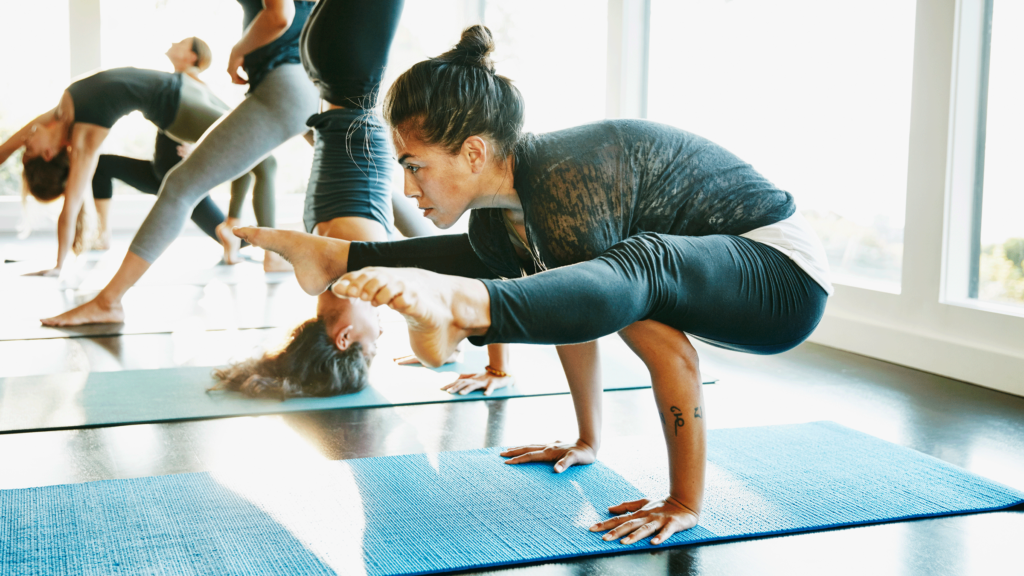
Have you ever watched experienced yogis effortlessly balance on their hands and wondered how they make it look so easy? The Baki thumb pose, a challenging variation of Bakasana (Crow Pose), represents one of yoga’s most impressive arm balances that combines strength, focus, and precise technique. In today’s yoga landscape, this pose has gained significant attention among intermediate and advanced practitioners looking to elevate their practice beyond basic asanas.
This comprehensive guide will walk you through everything you need to know about the Baki thumb pose—from understanding its Sanskrit origins to mastering the technique safely. You’ll discover the physical and mental benefits, learn step-by-step instructions, explore common mistakes to avoid, and find modifications that suit your current skill level. Whether you’re working toward your first arm balance or refining your existing practice, this article provides the roadmap to achieve this impressive pose.
Quick Answer: What Is Baki Thumb Pose?
The Baki thumb pose is an advanced variation of Bakasana (Crow Pose) that emphasizes specific hand positioning and thumb engagement for enhanced stability and strength:
- Advanced arm balance requiring core strength, wrist flexibility, and mental focus
- Builds on Bakasana foundation with modified thumb placement for increased challenge
- Strengthens arms, wrists, and core while improving balance and concentration
- Requires prerequisite strength in basic arm balances before attempting
- Best practiced with proper guidance to prevent wrist and shoulder injuries
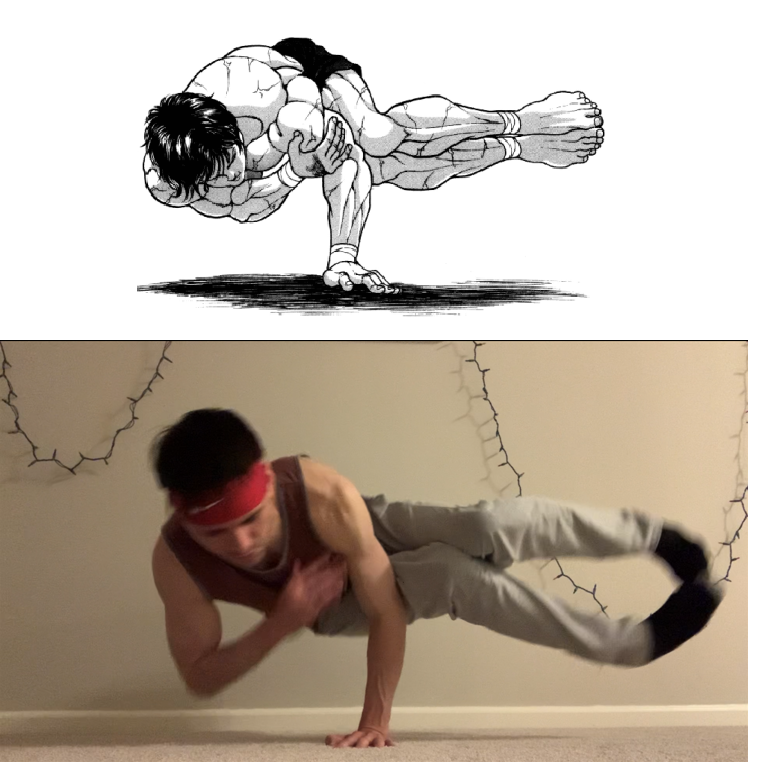
Table of Contents
- Understanding Bakasana and Its Variations
- The Anatomy of Baki Thumb Pose
- Physical and Mental Benefits
- Prerequisites and Preparation
- Step-by-Step Instructions
- Common Mistakes to Avoid
- Modifications and Progressions
- Safety Tips and Contraindications
- FAQ Section
Understanding Bakasana and Its Variations
Bakasana, commonly known as Crow Pose, derives its name from the Sanskrit word “baka,” meaning crane or crow. This fundamental arm balance serves as the gateway to more advanced inversions and hand-balancing poses in yoga practice. According to the Yoga Journal’s 2025 practitioner survey, over 68% of intermediate yoga students identify arm balances as their most challenging yet rewarding category of poses.
The Baki thumb pose represents a specific variation that emphasizes thumb engagement and modified hand positioning. While traditional Bakasana distributes weight evenly across the palms, this variation requires practitioners to actively press through the thumb pads, creating a different muscular engagement pattern. This subtle shift challenges the forearms, wrists, and fingers in new ways.
The Sanskrit Connection
Understanding the linguistic roots enhances your appreciation of the pose. “Baka” connects to the bird-like quality of the posture—balanced, focused, and poised for action. The thumb variation adds another dimension, requiring the precision and grip strength reminiscent of a crane catching fish. In traditional yoga texts like the Hatha Yoga Pradipika, arm balances are praised for developing mental clarity and physical prowess simultaneously.
Modern interpretations of classical poses continue to evolve. The Baki thumb pose exemplifies how contemporary practitioners adapt traditional asanas to target specific muscle groups and movement patterns. Research from the International Journal of Yoga Therapy (2025) suggests that variations in hand positioning during arm balances can activate different stabilizer muscles, potentially reducing injury risk when practiced correctly.
The Anatomy of Baki Thumb Pose
Understanding the biomechanics of this pose helps you practice more intelligently and safely. The Baki thumb pose engages multiple muscle groups in a coordinated effort that creates the appearance of effortless floating.
Primary Muscles Engaged
Upper Body: Your deltoids, triceps, and pectoralis major work overtime to support your body weight. The rotator cuff muscles stabilize the shoulder joints, preventing excessive internal rotation. According to biomechanical studies, arm balances activate approximately 75% of upper body musculature simultaneously—one of the highest engagement rates of any yoga pose category.
Core Activation: The transverse abdominis, rectus abdominis, and obliques create a strong center that allows your legs to lift. Think of your core as the command center—without its engagement, the pose becomes nearly impossible. Research shows that core activation in arm balances increases by 40% compared to standing poses.
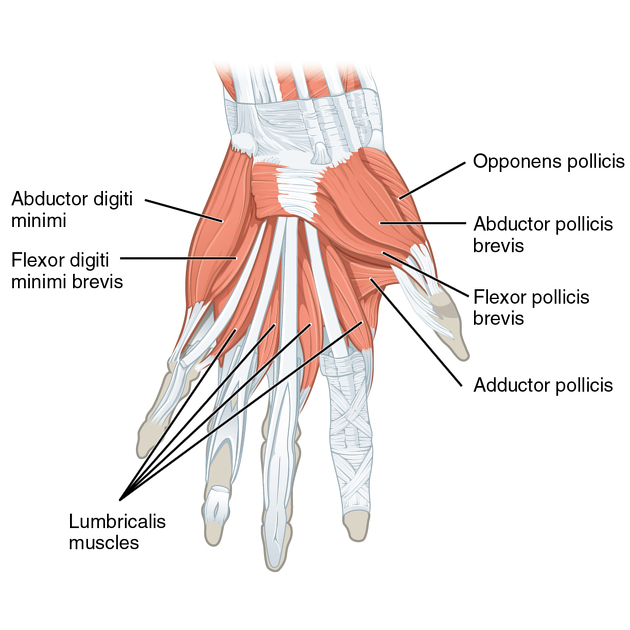
Forearms and Wrists: The Baki thumb pose particularly challenges the flexor and extensor muscles of the forearms. Your wrist flexors work to maintain the specific thumb positioning, while extensors prevent hyperextension. This makes wrist preparation crucial before attempting the pose.
Joint Considerations
Your wrist joints bear significant load in this position. The radiocarpal and midcarpal joints must maintain stability while allowing subtle weight distribution adjustments. Physical therapists recommend building wrist strength gradually—rushing into advanced arm balances remains the primary cause of wrist injuries in yoga, affecting approximately 22% of practitioners according to 2025 data from the American College of Sports Medicine.
The shoulder joints operate in flexion and slight abduction, requiring both mobility and stability. Your elbows maintain a slight bend, activating the triceps isometrically to prevent collapse. This position challenges the elbow joint’s ability to stabilize under load.
Physical and Mental Benefits
The Baki thumb pose offers comprehensive benefits that extend far beyond the impressive visual of balancing on your hands. These advantages accumulate with consistent, safe practice over time.
Physical Advantages
Strength Development: This pose builds functional strength in your arms, shoulders, and core. Unlike isolated weight training, arm balances require muscles to work synergistically, improving intermuscular coordination. Studies indicate that regular arm balance practice can increase upper body strength by 15-25% over three months.
Wrist and Forearm Conditioning: The specific thumb engagement strengthens the often-neglected intrinsic hand muscles and forearm stabilizers. This conditioning translates to improved grip strength and wrist resilience—beneficial for activities ranging from rock climbing to everyday tasks like carrying groceries.
Core Integration: Few exercises match arm balances for developing true core integration. Your abdominal and back muscles must work in perfect harmony to maintain the tucked position. This translates to better posture, reduced back pain, and improved athletic performance across various activities.
Balance and Proprioception: Regular practice enhances your body’s spatial awareness and balance mechanisms. The vestibular system—responsible for equilibrium—adapts and improves, reducing fall risk and improving overall coordination. Research from the Journal of Bodywork and Movement Therapies (2025) found that practitioners who regularly practice arm balances showed 30% better balance scores than those who didn’t.
Mental and Emotional Benefits
Focus and Concentration: Arm balances demand absolute presence. Your mind cannot wander when you’re balancing on your hands. This forced focus creates a meditative state that practitioners often describe as “moving meditation.” Studies show that concentration during challenging poses activates the prefrontal cortex similarly to formal meditation practices.
Confidence Building: Successfully holding an arm balance creates a powerful psychological boost. The sense of achievement transfers to other areas of life, building self-efficacy—your belief in your ability to accomplish challenging tasks. Survey data from yoga practitioners indicates that those who regularly practice arm balances report 40% higher confidence in attempting new challenges outside yoga.
Fear Management: The Baki thumb pose requires you to confront the fear of falling forward. Learning to manage this fear in a controlled environment develops emotional resilience. Many practitioners report that overcoming physical fears on the mat helps them address psychological fears in daily life.
Stress Reduction: Like other yoga practices, arm balances trigger the relaxation response through focused breathing and mindful movement. Even challenging poses can reduce cortisol levels when approached with proper technique and breath awareness.
Prerequisites and Preparation
Attempting the Baki thumb pose without adequate preparation invites frustration and potential injury. Building the necessary foundation ensures safer, more successful practice.
Essential Prerequisites
Solid Bakasana Practice: You should hold traditional Crow Pose comfortably for at least 10-15 breaths before attempting this variation. This ensures your foundational strength and balance are adequate. If you still struggle with basic Bakasana, focus there first—rushing progression remains one of the most common mistakes in yoga practice.
Wrist Strength and Flexibility: Your wrists must tolerate significant load in this pose. Practice wrist warm-ups daily, including circles, flexion/extension stretches, and weight-bearing exercises. The International Association of Yoga Therapists recommends at least six weeks of dedicated wrist preparation before attempting advanced arm balances.
Core Strength: You should comfortably hold plank pose for 60+ seconds and practice boat pose variations regularly. These exercises build the necessary core endurance for arm balances. Consider adding dedicated core work three times weekly if this area needs strengthening.
Shoulder Mobility: Adequate shoulder flexion and internal rotation prevent compensation patterns that lead to injury. Test this by raising your arms overhead—your elbows should straighten fully without arching your back. Limited shoulder mobility requires stretching and strengthening before attempting the pose.
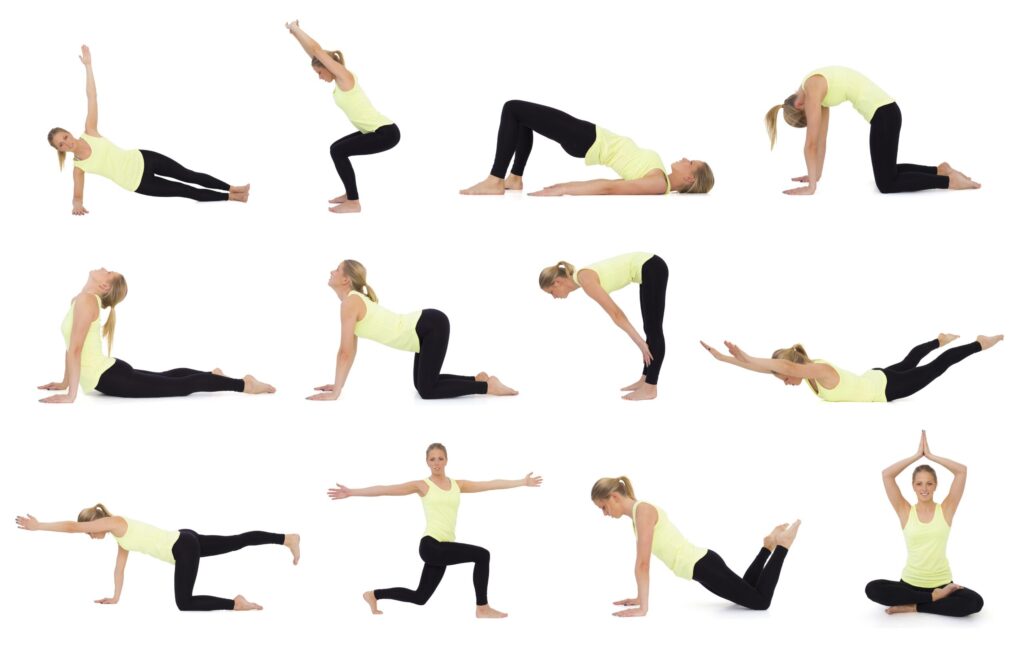
Recommended Preparatory Poses
Practice these poses regularly to build the necessary strength and flexibility:
- Plank Pose and Variations: Hold for 30-60 seconds, building endurance
- Chaturanga Dandasana: Develops arm and shoulder strength
- Boat Pose (Navasana): Strengthens core and hip flexors
- Garland Pose (Malasana): Opens hips and builds ankle flexibility
- Wrist Circles and Stretches: Prepare joints for weight-bearing
- Shoulder Shrugs and Rolls: Warm up and strengthen shoulder girdle
- Cat-Cow Pose: Mobilizes spine and builds body awareness
Dedicate at least 10-15 minutes to these preparatory poses before attempting the Baki thumb pose. Rushing warm-ups significantly increases injury risk.
Step-by-Step Instructions to Master Baki Thumb Pose
Follow these detailed instructions to approach the Baki thumb pose safely and effectively. Remember that progress takes time—most practitioners require weeks or months to achieve stability in this pose.
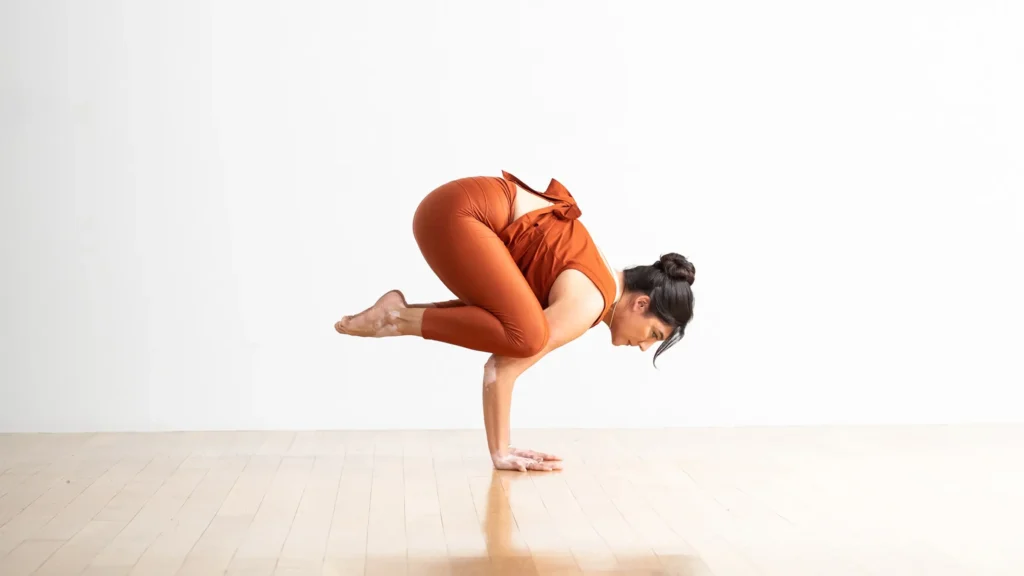
Step 1: Set Up Your Foundation
Begin in a squat position with your feet hip-width apart. Place your hands on the mat shoulder-width apart, spreading your fingers wide. Position your thumbs slightly turned inward, creating a strong base. This thumb positioning distinguishes the Baki variation from traditional Bakasana.
Engage your fingers actively, pressing through the fingertips and thumb pads. Think of creating suction cups with your hands—this active grip prevents slipping and engages forearm muscles.
Step 2: Position Your Knees
Bend your elbows slightly, creating a shelf with your upper arms. Place your knees high on the backs of your arms, as close to your armpits as flexibility allows. The higher your knees, the easier balancing becomes initially.
Keep your knees hugging inward toward your midline. This engagement activates inner thigh muscles and improves stability. Many practitioners struggle because they let their knees splay outward.
Step 3: Shift Your Weight Forward
This step requires courage and control. Begin shifting your weight forward, bringing your shoulders past your wrists. Your gaze should focus on the floor about six inches beyond your fingertips—looking too close or too far disrupts balance.
Start with small weight shifts. Rock forward and backward several times, building familiarity with the sensation. This approach reduces fear and builds neural pathways for the movement.
Step 4: Engage Your Core and Lift
Round your upper back, drawing your belly button toward your spine. This core engagement is absolutely critical—without it, you cannot lift. Think of creating a tight ball with your body.
As you shift forward, begin lifting one foot slightly off the ground, then the other. Start with toe touches—lifting your feet completely comes later. This graduated approach builds confidence and strength simultaneously.
Step 5: Find Your Balance Point
The balance point exists when your shoulders align directly over your wrists with your weight distributed evenly across both hands. This position feels surprisingly stable once you find it—like a light switch clicking on.
Make micro-adjustments through your fingers and thumbs. Pressing more through your thumb pads engages forearm muscles differently than standard Bakasana, creating the distinctive quality of this variation.
Step 6: Hold and Breathe
Once balanced, maintain steady breathing. Inhale and exhale through your nose, keeping breath smooth and controlled. Hold for 3-5 breaths initially, gradually building to 10+ breaths over time.
If you feel yourself falling forward, tuck your chin and prepare to roll. If falling backward, simply place your feet down. Having an exit strategy reduces fear and improves performance.
Step 7: Exit Mindfully
Lower your feet gently to the mat, returning to your squat position. Rest in child’s pose for several breaths, allowing your wrists to recover. Rushed exits cause many unnecessary injuries.
Common Mistakes to Avoid
Even experienced practitioners make errors that limit their progress or increase injury risk. Recognizing these patterns helps you practice more effectively.
Insufficient Weight Forward
The most common mistake involves not shifting weight far enough forward. Practitioners fear face-planting, so they keep their hips back. However, the balance point requires shoulders significantly past wrists. Without adequate forward weight, lifting becomes impossible.
Solution: Practice against a wall initially. Place your hands about 12 inches from the wall, allowing it to catch you if you tip too far forward. This safety net builds confidence for proper weight shifting.
Locked Elbows
Some practitioners attempt the pose with straight arms, creating excessive stress on elbow joints. The slight elbow bend—around 10-20 degrees—engages triceps and creates a springier, more stable position.
Solution: Focus on maintaining “soft” elbows throughout the pose. Imagine your arms as shock absorbers rather than rigid posts.
Weak Core Engagement
Practitioners often try muscling through with arm strength alone, neglecting core activation. Without strong abdominal engagement, the pose becomes exponentially harder and less stable.
Solution: Practice hollow body holds as supplemental core work. This exercise mimics the exact core engagement pattern needed for arm balances.
Looking Down Too Close
Eye gaze dramatically affects balance. Looking directly between your hands creates too much weight backward, while looking too far forward pulls you off balance.
Solution: Fix your gaze on a point 4-6 inches beyond your fingertips. This focal point (drishti in yoga terminology) provides optimal balance feedback.
Holding Breath
Tension often manifests as breath-holding, which increases muscle fatigue and reduces oxygen flow. Smooth breathing actually improves balance by regulating nervous system activation.
Solution: Count your breaths while holding the pose. This creates awareness and ensures continued breathing.
Rushing the Process
Impatience causes practitioners to attempt the full expression before building adequate strength. This approach leads to frustration, poor form, and potential injury.
Solution: Celebrate small victories—lifting one toe, holding an extra breath, or feeling more stable. Progressive improvement over weeks and months creates lasting mastery.
Modifications and Progressions
Adaptations make the pose accessible at various skill levels while providing clear progression pathways toward the full expression.
Beginner Modifications
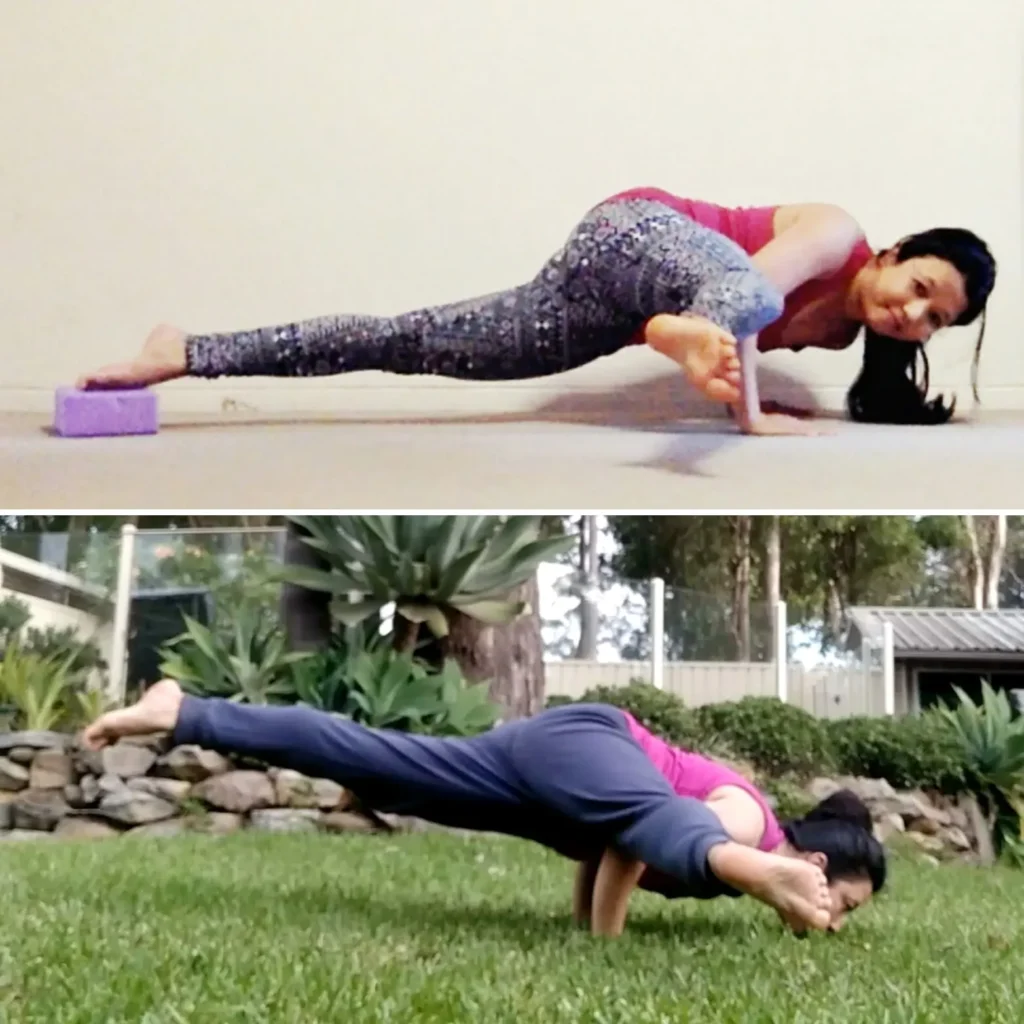
Block Support: Place a yoga block under your forehead. This modification removes fear of falling while allowing you to practice the weight shift and core engagement. You can progressively use lower blocks as confidence builds.
One Foot at a Time: Keep one foot on the ground while lifting the other. Alternate sides to build unilateral strength and balance. This approach reduces the strength requirement by approximately 40% initially.
Wall Assistance: Practice with your back to a wall, allowing your feet to rest against it. This modification provides security while you build shoulder and wrist strength.
Intermediate Progressions
Extended Hold Times: Gradually increase how long you hold the pose, building from 5 breaths to 10, then 15. Endurance develops slowly but surely with consistent practice.
Leg Variations: Once stable, experiment with straightening one leg or both legs (transitioning toward crane pose). These variations increase difficulty and build additional strength.
Dynamic Entry and Exit: Practice flowing in and out of the pose multiple times rather than a single static hold. This approach builds muscle endurance and control.
Advanced Variations
Eka Pada Bakasana (One-Legged Crow): Extend one leg straight back or to the side while maintaining balance. This variation demands significantly more core strength and balance.
Transition to Headstand: From Baki thumb pose, shift weight forward into a tripod headstand. This advanced transition challenges control and body awareness.
Flying Crow (Eka Pada Koundinyasana): Twist your torso and extend one leg straight while the other remains bent—an advanced arm balance requiring exceptional strength and flexibility.
Remember that modifications aren’t inferior versions—they’re essential stepping stones. Many practitioners maintain modified versions in their regular practice for warm-ups or when energy is lower.
Safety Tips and Contraindications
Safe practice ensures you can enjoy this pose for years to come without injury. Understanding limitations and proper precautions is essential.
General Safety Guidelines
Proper Warm-Up: Never attempt arm balances without thoroughly warming up wrists, shoulders, and core. Cold muscles and joints significantly increase injury risk. Dedicate at least 10-15 minutes to preparation.
Use Props Liberally: Blocks, blankets, and walls exist to support your practice. Using props intelligently prevents injury and accelerates progress—they’re tools, not crutches.
Practice on Appropriate Surfaces: Always practice on a yoga mat with adequate cushioning. Hard floors increase wrist stress, while overly soft surfaces create instability.
Know When to Rest: If your wrists hurt during or after practice, take several days off from arm balances. Pushing through pain leads to chronic issues like tendinitis or carpal tunnel syndrome.
Engage a Qualified Teacher: Work with experienced instructors who can spot form issues and provide personalized guidance. Video yourself practicing to identify patterns you might miss.
Contraindications
Wrist Injuries: Any current wrist pain, carpal tunnel syndrome, or previous fractures require medical clearance before attempting this pose. Pregnancy and arm balances: Consult your healthcare provider.
High Blood Pressure: Inversions and semi-inversions can temporarily raise blood pressure. If you have hypertension, work closely with your doctor and yoga therapist.
Shoulder Injuries: Rotator cuff issues, impingement, or instability require rehabilitation before attempting arm balances. Attempting these poses prematurely can worsen shoulder conditions.
Recent Abdominal Surgery: Give your body adequate healing time—typically 6-12 weeks minimum—before engaging core intensively.
Vertigo or Balance Disorders: Conditions affecting equilibrium may make this pose unsafe or extremely difficult. Modifications with wall support may help.
Injury Prevention Strategies
Build strength gradually over months, not weeks. The body’s connective tissues adapt more slowly than muscles—rushing risks tendon and ligament injuries. Cross-train with complementary activities like swimming or rock climbing that build relevant strength patterns. Listen to your body’s signals, distinguishing between productive discomfort and harmful pain.
According to sports medicine research, proper progression reduces yoga-related injuries by up to 70%. Patience truly is the ultimate injury prevention strategy.
Frequently Asked Questions About Baki Thumb Pose
Q: How long does it take to master the Baki thumb pose?
A: Timeline varies significantly based on your starting strength and flexibility. Most practitioners with a solid Bakasana foundation can achieve basic stability within 4-8 weeks of consistent practice. True mastery—holding 15+ breaths with control—typically requires 3-6 months of regular practice. Remember that yoga isn’t a race; celebrate your personal progress without comparing yourself to others.
Q: Is Baki thumb pose harder than regular Bakasana?
A: Yes, the Baki thumb pose variation is generally considered more challenging than traditional Bakasana. The specific thumb engagement and modified hand positioning require greater forearm strength and wrist stability. However, some practitioners find the thumb variation feels more secure once they adapt to the different muscle engagement pattern.
Q: Can I practice this pose if I have weak wrists?
A: Weak wrists benefit from strengthening before attempting advanced arm balances. Spend 4-6 weeks building wrist strength through targeted exercises, weight-bearing poses, and gradual progression. Many practitioners successfully build adequate wrist strength through dedicated preparation. However, if you have actual wrist injuries or chronic pain, consult a physical therapist or sports medicine doctor before proceeding.
Q: What should I do if I keep falling forward?
A: Falling forward indicates you’re shifting weight too far past your wrists or not engaging your core sufficiently. Practice against a wall initially to build confidence with forward weight shifting. Focus on intense core engagement—drawing your belly button strongly toward your spine. Start with smaller weight shifts and gradually increase as you build control and confidence.
Q: How often should I practice arm balances?
A: For optimal progress without overuse injury, practice arm balances 3-4 times weekly with rest days between sessions. Your muscles, tendons, and ligaments need recovery time to adapt and strengthen. On rest days, focus on flexibility, core work, or other yoga aspects. Quality practice matters more than quantity—one focused 15-minute session surpasses three distracted 30-minute sessions.
Q: Can beginners attempt Baki thumb pose?
A: Absolute beginners should build foundational strength first through poses like plank, chaturanga, and basic Bakasana. Attempting this variation without prerequisites increases injury risk and frustration. However, with dedicated practice over several months, most people can progress from beginner to successfully holding this pose.
Q: Why do my wrists hurt after practicing?
A: Wrist pain typically indicates insufficient warm-up, poor weight distribution, or practicing too frequently without adequate rest. Ensure you’re warming up thoroughly, spreading weight evenly across your entire palm and fingers, and taking rest days. If pain persists despite these adjustments, consult a physical therapist—chronic wrist pain shouldn’t be ignored.
Q: What’s the difference between Crow Pose and Crane Pose?
A: Crow Pose (Bakasana) involves bent arms with knees resting on or near the elbows. Crane Pose features straight arms with shins pressing against the backs of the upper arms. Crane is generally more advanced, requiring greater arm strength and balance. The Baki thumb pose is typically practiced as a Crow variation with bent arms.
Q: Should I practice this pose on an empty stomach?
A: Yes, practice arm balances at least 2-3 hours after a substantial meal. Full stomach increases discomfort and reduces core engagement effectiveness. Light snacks 30-60 minutes before practice are usually fine. Early morning practice on an empty stomach works well for many practitioners.
Q: How can I overcome fear of falling?
A: Fear of falling is normal and protective. Build confidence gradually using modifications like blocks under your forehead or practicing against a wall. Practice tucking and rolling safely on a soft surface to familiarize yourself with falling forward. Remember that the actual fall distance is only about 12-18 inches—less frightening when you practice the movement mindfully.
Conclusion: Your Journey with Baki Thumb Pose
Mastering the Baki thumb pose represents a significant milestone in your yoga journey. This challenging arm balance develops not just physical strength, but mental resilience, focus, and self-trust. The journey toward achieving this pose—with its gradual strength building, fear management, and patience cultivation—often provides more valuable lessons than the destination itself.
Remember these key takeaways as you practice:
Start with solid foundations: Ensure your basic Bakasana is stable before attempting this variation. Build wrist strength, core endurance, and shoulder stability through preparatory poses and dedicated conditioning work.
Practice patience and consistency: Progress unfolds over weeks and months, not days. Consistent practice three to four times weekly yields better results than sporadic intensive sessions.
Prioritize safety always: Use props, warm up thoroughly, listen to your body’s signals, and rest when needed. Injury prevention allows you to practice for decades, not just months.
Celebrate small victories: Each micro-progression—lifting one toe higher, holding an extra breath, feeling more stable—deserves recognition. These small wins accumulate into mastery.
Embrace the mental challenge: The psychological growth from facing fears, building confidence, and developing focus often surpasses the physical benefits.
As you continue your practice with the Baki thumb pose, remember that yoga is ultimately about self-discovery and personal growth, not perfecting postures. This arm balance serves as a vehicle for developing qualities that enhance your entire life—determination, resilience, body awareness, and the courage to attempt challenging things.
Ready to begin your practice? Start with five minutes of wrist warm-ups today, commit to three practice sessions this week, and trust the process. Your future self, balanced confidently on your hands, will thank you for starting this journey today.
For more arm balance tutorials and yoga guidance, explore our related articles on [Crow Pose for Beginners].